Содержание
Object management through the internet
General instructions for using static IP-address, DDNS service and setup of the NAT, Port Forwarding in the i3 lite through the internet.
How to connect i3 lite to hardware
i3 lite app can connect to iRidium server through the internet for management and to receive data from physically remote hardware. For this you need to setup your network hardware (router). Let's view the ways of hardware remote control.
Connection through the static IP address in the internet.
i3 can connect to a remote router and to a hardware through it via the router internet IP-address on condition that it does NOT change i.e. it is static.
1 Getting the static IP-address in the internet
Static IP-address can be assigned to your IP-router only by Internet provider. If you use mobile internet, assignment of Static IP-address is impossible, go to the next option (DDNS).
Permanent IP-address is called "static external" and means that you can connect to your router from anywhere in the world and it's IP-address does NOT change
What is my internet IP-address? (IP-address changes if it is NOT static)
Not all internet providers can give you the static IP-address. But if the provider does use a provider's instruction to setup the router to work with static IP-address.
Providing access to hardware through the router is a next step - NAT and PortForwarding setting
2 Nat and PortForwarding setting on the router
The NAT service provides transfer of data sent to the router from the external network to LAN. If rules of data transfer are not set up, commands will not be sent anywhere but your router.
NAT (Network Address Translation) - the service for translation of internal network IP-addresses to IP- addresses of the external network. Before you start to set up NAT, give the equipment you use static local IP-addresses
The principle of forwarding data from the external network to the internal one:
- a remote device sends a command to the router address in the Internet and the "external" port of the equipment specified in the table of data forwarding
- the router forwards the command to the device in the local network specified in the table of data forwarding
- the command is executed by the device
The number of forwarding "rules" on the router has to be set up based on what devices of your network have to receive data or commands from the Internet.
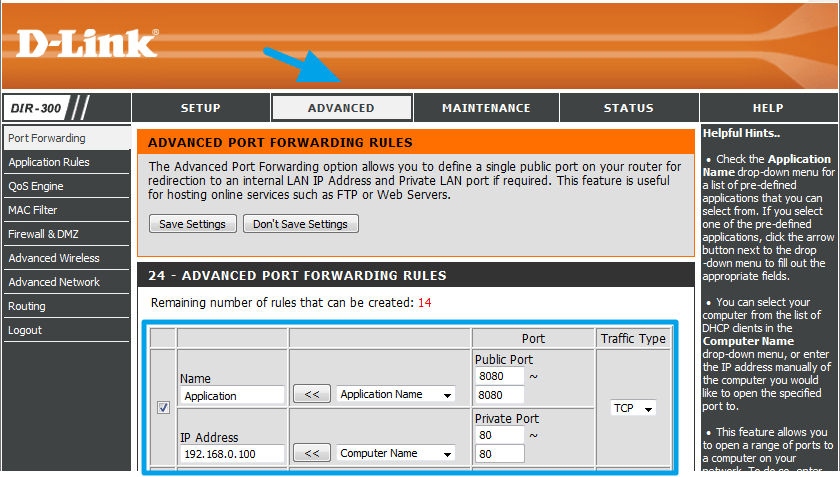
Using the example of the D-Link router, let us set up one forwarding rule (every network device needs its own rule):
- "IP Address" - the local IP-address of the device on which you want to send commands from the Internet
- "Public Port" - the port where you need to send the command from the Internet so it would come to the device
- "Private Port" - the real hardware port that receives commands (it can be different from "Public Port")
- "Traffic Type" - the allowed protocol for connection between the sender and receiver of commands (TCP or UDP)
Example Provider gives to your router the public static IP address 215.110.10.15. You set a data redirection from external TCP port 8445 to internal TCP port 8443 on 192.168.0.100 host which is iRidium server IP address.
Connection through a subdomain DDNS without the static address
i3 lite can connect to a remote router via a domain name which is given to router by DDNS service. The domain name is used if the internet provider does NOT give the static IP-address or when you use a mobile internet.
Without the static IP-address, your IP will constantly change. It is called a dynamic IP-address. Change of the IP-address leads to the fact that the control program could NOT apply to hardware by the external IP-address, because it periodically loses the relevance.
Companies which can provide a service of dynamic DNS (DDNA or DynDNS) are able to solve the problem with dynamic IP-address. This service is used to assign the constant domain name to the router with the dynamic IP-address. This service can be provided by: No-IP, DynDNS and others.
Let's consider an assignment of subdomain to the router via the paid service No-IP. There are 3 stages of configuration:
- Register the subdomain on the site, which provide the DDNS service.
- Set up the DDNS service on the router
- Set up the Nat, PortForwarding service on the router
1 Account and subdomain registration on No-IP.com
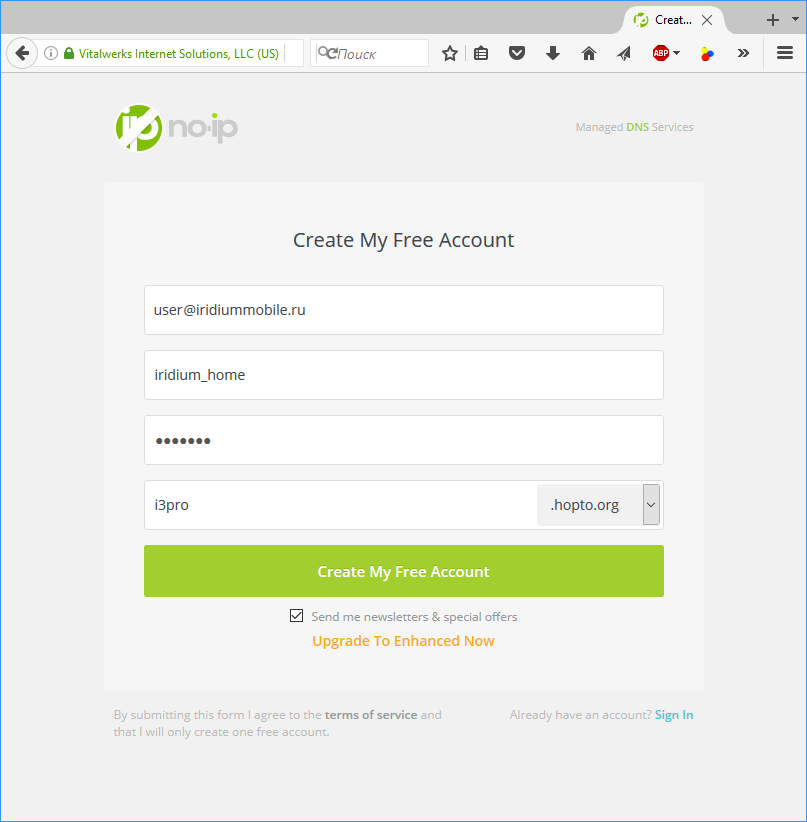
- Register a new account on No-IP. During the account registration select a subdomain address - you can use this address as your router address. For example:
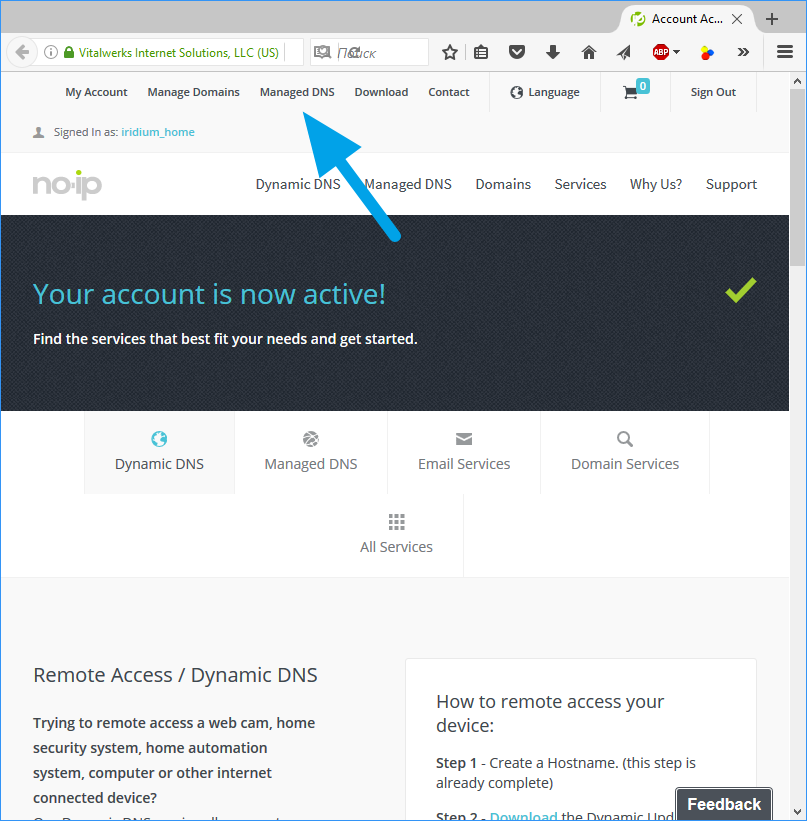
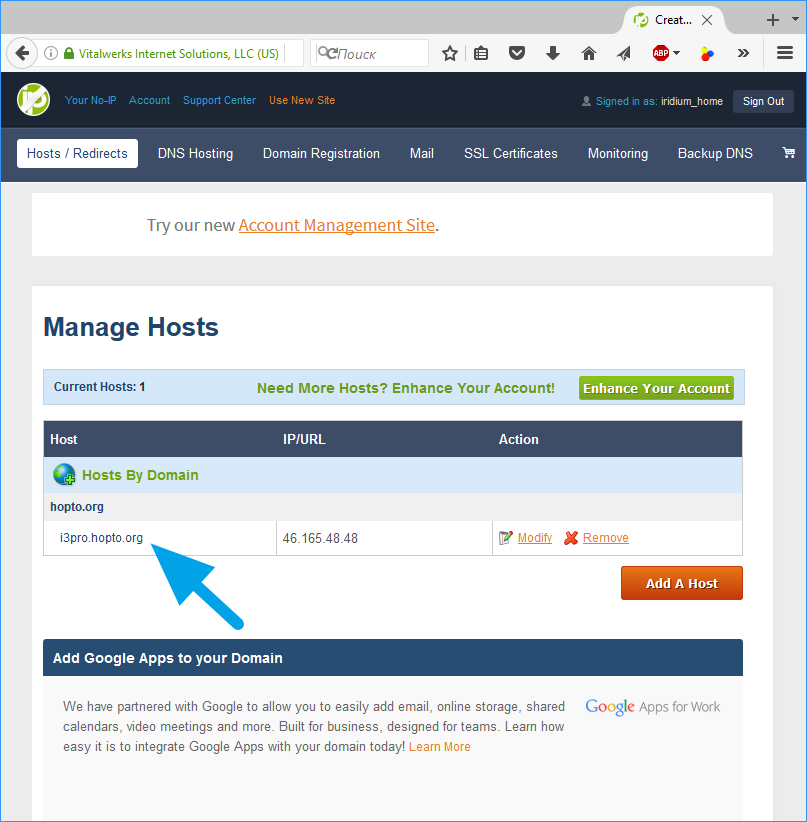
i3pro.hopto.org - Confirm account registration (a confirmation code will come on e-mail). You will get access to manage the domains in the "Managed DNS" field.
- The subdomain registered during the creation of account is already active. Subdomain name is needed for setting the router
- Note that in a free No-IP account you need to prolongate the subdomain every month (click the button on the site to prolongate). Otherwise it will stop working. You can pay one year subscription or more to create multiple domains, which will constantly work. See subscription terms on the site.
2 Setting the router for working with No-IP DDNS service
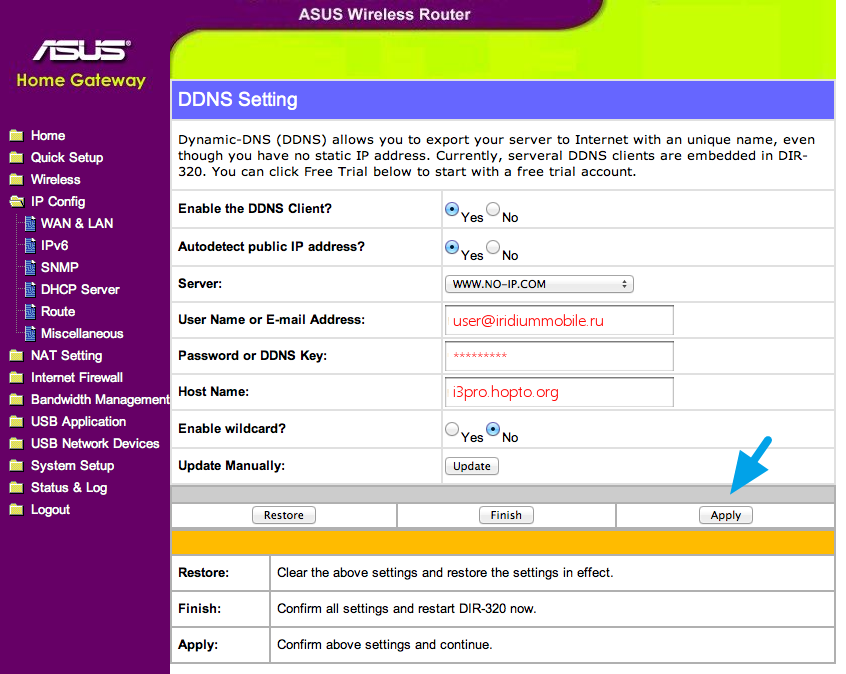
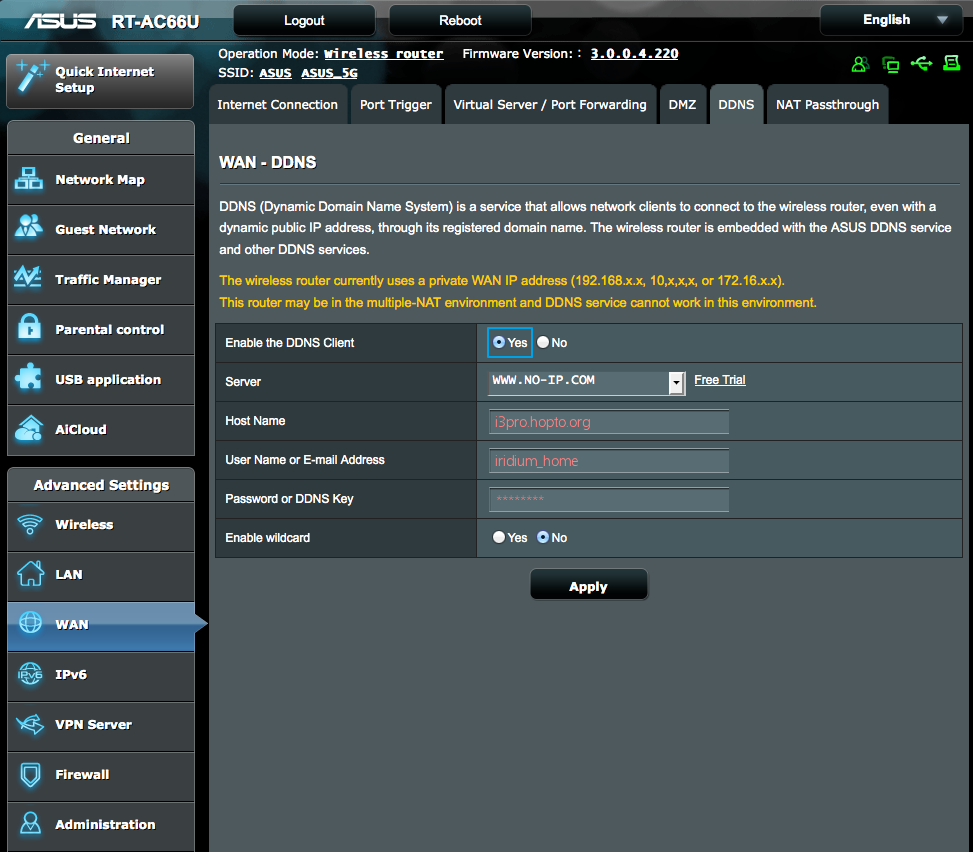
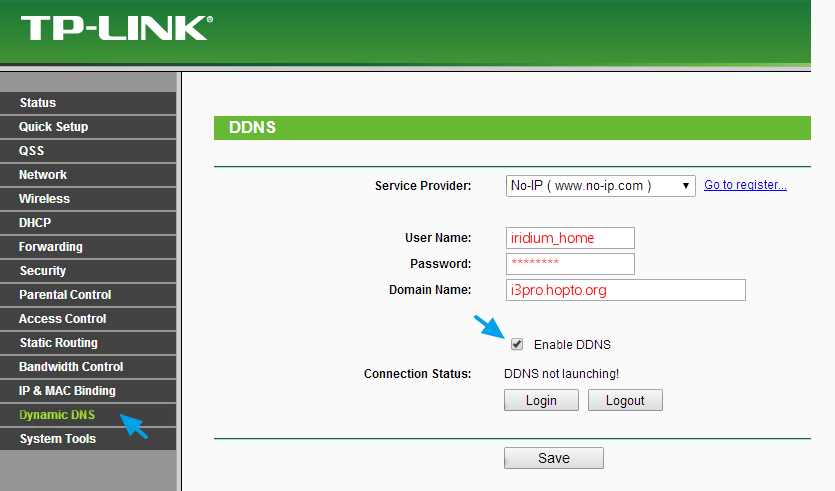
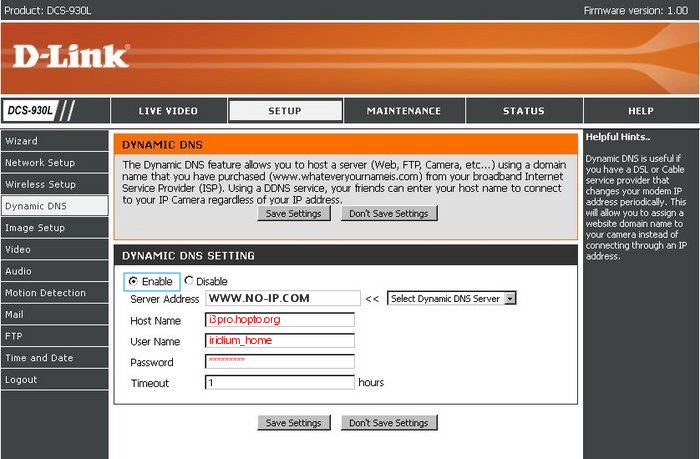
Make sure your router supports DDNS. Path to DDNS settings depends on model and manufacturer of the router. Examples:
DDNS settings are approximately the same regardless of the router model:
- "Enable the DDNS Client" - activate the service on the router
- "Server" - server of the DDNS service provider. In our case:
WWW.NO-IP.COM - "User Name or E-mail Address" - login or e-mail which you entered during account registration on noip.com
- "Password" - your account password on noip.com
After saving DDNS settings your router will report noip.com it's internet IP-address and noip.com will redirect to the router a data sent to the subdomain's address.
3 Nat and PortForwarding setting on the router
The NAT service provides transfer of data sent to the router from the external network to LAN. If rules of data transfer are not set up, commands will not be sent anywhere but your router.
NAT (Network Address Translation) - the service for translation of internal network IP-addresses to IP- addresses of the external network. Before you start to set up NAT, give the equipment you use static local IP-addresses
The principle of forwarding data from the external network to the internal one:
- a remote device sends a command to the router address in the Internet and the "external" port of the equipment specified in the table of data forwarding
- the router forwards the command to the device in the local network specified in the table of data forwarding
- the command is executed by the device
The number of forwarding "rules" on the router has to be set up based on what devices of your network have to receive data or commands from the Internet.
Using the example of the D-Link router, let us set up one forwarding rule (every network device needs its own rule):
- "IP Address" - the local IP-address of the device on which you want to send commands from the Internet
- "Public Port" - the port where you need to send the command from the Internet so it would come to the device
- "Private Port" - the real hardware port that receives commands (it can be different from "Public Port")
- "Traffic Type" - the allowed protocol for connection between the sender and receiver of commands (TCP or UDP)
Example You have registered the subdomain i3lite.hopto.org on noip.com and activate the DDNS service on the router. Also you have set up on the router the data redirect rule from external 8080 TCP port to internal 8443 TCP port with 192.168.0.100 IP-address, which is the hardware address.
To connect to the hardware through the internet you need to specify in settings:
Host: i3lite.hopto.org, Port: 8080
Setting up a connection to iRidium server through the internet
To configure the object remote control you need to:
1
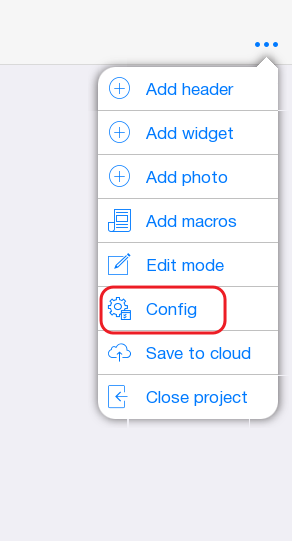
Open a project in i3 lite app and go to a Config
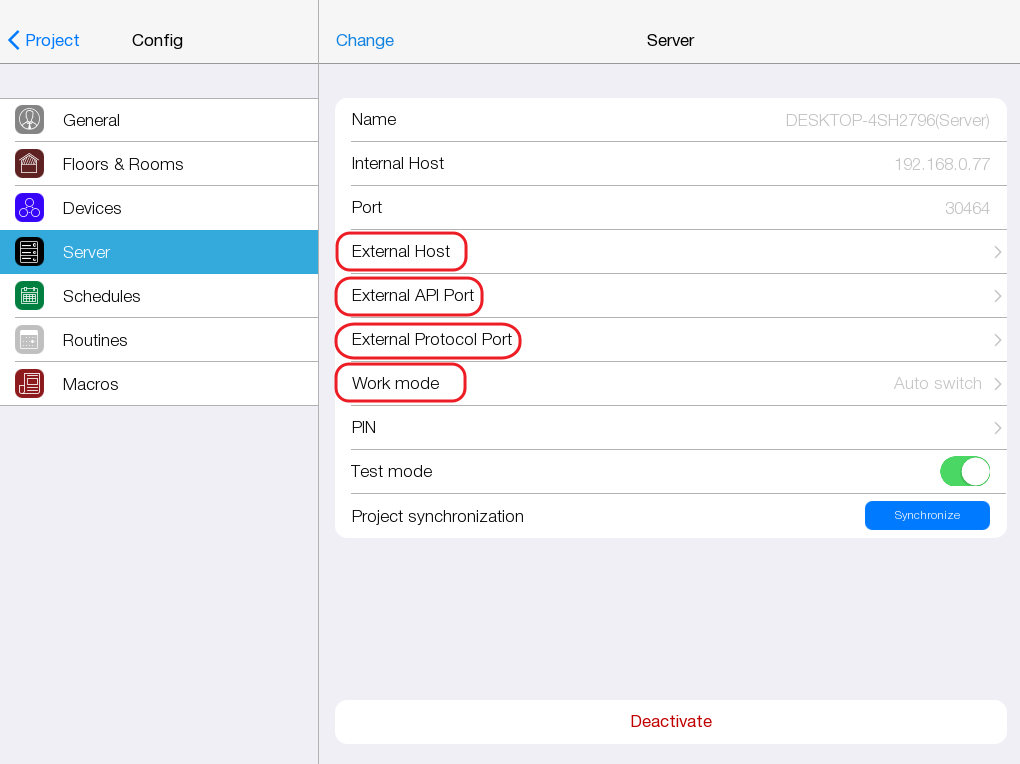
2 Go to a "Server" field. In this field you need:
- Work mode - connection mode to iRidium Server
- Auto - automatic switching between local mode and the mode of operation via the Internet
- Local - local connection only
- External - connection through the internet only
- External Host - external router IP-address
- External API port - port for work with authorization and service functions of the server. It uses the 8443 port in the local network
- External Protocol Port - port for work with devices, used in the project. It uses the 30464 port in the local network
If the project must work only in the local network you have to specify "Local" in the "Work mode" field. For work with server through the internet you have to specify "External" or "Auto" and fill the external network settings fields. For remote working you have to create on the router 2 external ports for 8443 and 30464 local ports.
3
Enter external ports and external IP-address of the router in server settings:
- In the "External Host" field enter external IP-address of the router
- In the "External Api Port" field enter external port for 8443 port.
- In the "External Protocol Port" field enter external port for 30464 port
- In the "Work mode" field specify Auto or External
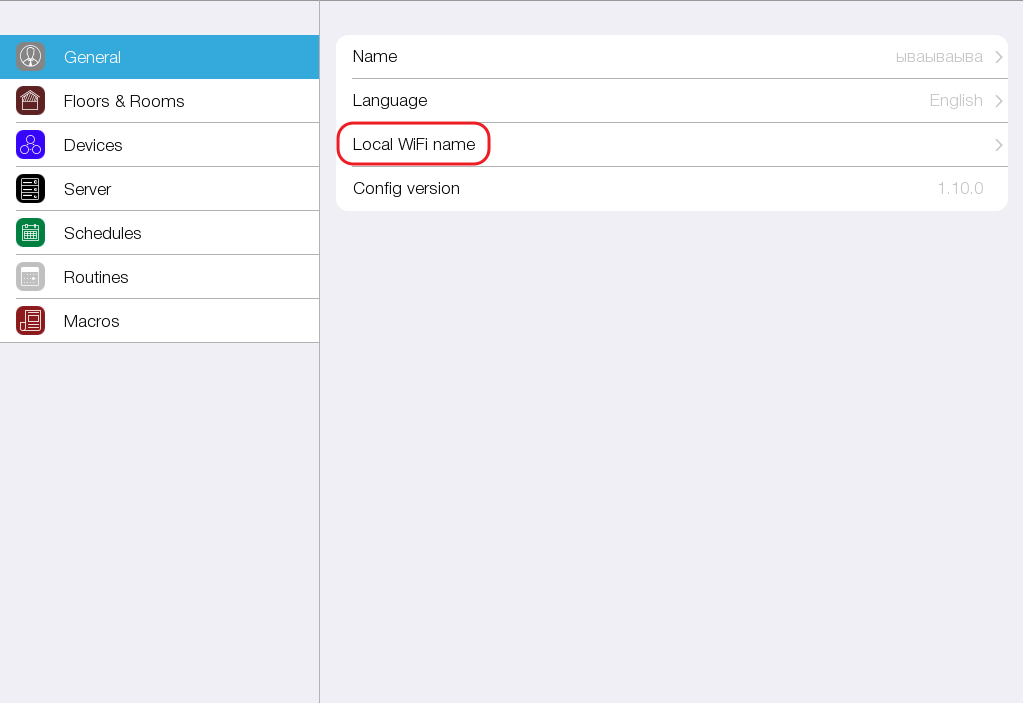
4 If you use an auto-switching mode (Work mode: Auto), you need to go to "General" field in the Config and enter name of your home network in the "Local WiFi" field. In the auto-mode the app defines in what WiFi network user is in. If the user is in the home network, the app connects to the server with local settings. If the app is NOT connected to WiFi or network name is different from the home network one, app connects to the server with settings of working through the internet


